
Ever dreamt of owning a travel agency website but worried it’s too technical? What if I told you that there are several ways to create a user-friendly travel booking website without a line of code? Here’s a guide that will help you do just that!
In this guide, I’ll walk you through every step, from picking a domain name to setting up secure booking and eye-catching content. You’ll learn how to display your tours, add a secure booking system and include trust-building testimonials within your website.
Here’s a quick overview of the steps I will be covering:
- Select the best suitable platform for your website
- Find a website host.
- Get your domain name
- Install a suitable theme for your website.
- Add functionality by installing plugins
- Create informative and engaging content
- Customize your website
- Integrate booking system and payment gateways.
- Launch your website
- Promote your website
- Keep your website up to date.
What is a Travel Website?
Let’s start with what a travel website really is.
A travel website is an online resource all about travel, typically aimed at helping people plan and book their trips. They can cover a wide range of aspects, including:
- Trip Booking: Many travel websites allow users to book tours, flights, hotels, car rentals, and other travel components directly on their platform. These are often like online travel agencies.
- Travel Information: Travel websites provide a wealth of information on destinations all around the world, including things to see and do, cultural insights, and practical tips.
- Reviews and Recommendations: Many travel websites include user-generated reviews and recommendations for hotels, restaurants, attractions, and other travel experiences.
- Inspiration and Planning: Travel websites can be a great source of inspiration for trip planning, with articles, photos, and videos showcasing different destinations and travel styles.
How Much is a Travel Website?
Cost is an important factor to consider before creating a travel website. Your cost may look widely different depending on the complexity of your website.
Let me break down the cost of building your travel website using WordPress:
- Domain Name: $10 – $20 per year (typically a one-time yearly fee)
- Website Hosting: $3 – $20 per month (costs can vary depending on storage, bandwidth, and features)
- Theme: Free – $200+ (Free themes are available, but premium themes offer more features and customization)
Now, here’s the twist.
The cost can jump depending on who builds your website.
Do-It-Yourself (DIY)
Building it yourself is the cheapest option. Think of it as putting up your own shelves: You’ll just pay for the domain name, hosting, and maybe a free theme.
Assuming you’re using a free theme and free plugins, using this method could cost around:
| Item | Cost | Notes |
| Domain Name | $10 – $20 per year | Typically, a one-time yearly fee |
| Website Hosting | $3 – $20 per month | Basic plans are sufficient to start |
| Theme | Free – $200+ | Free themes work, but premium themes offer more features and polish your website. |
| Plugins | Free – $100+ | Optional, depending on the desired functionality |
| Security Certificate | Free – $50 per year | Basic SSL certificates are sufficient |
| Total Cost (Year 1): | $36 – $510 |
Hiring a Freelancer or Small Agency
While hiring someone to do the task for you might offer more customizability and added features, it would come at a higher price.
Here’s an estimated cost breakdown:
- Simple Website: $1,000 – $5,000
- More Complex Website (Booking Functionality): $3,000 – $20,000+ (Price increases with features like payment gateways and integrations)
So, the choice is yours! DIY for a budget-friendly option, or hire a pro for more features and a polished look.
Essential Elements of a Travel Agency Website
A good travel company website tells the story behind the brand while informing visitors about the travel services available.
Thus, you’ll first need to analyze and identify the features, functionality, and sections your travel website must have on it.
A professional travel agency website requires the following features:
1. Company’s Whereabouts
As a travel agency, you need to make a great first impression. Only then will you be able to win over your potential customers. Connect with your visitors by telling them your brand story and how your company came into existence.
Once you connect with your customers and convince them to like your whereabouts, they are more likely to purchase services from you. This way, you can grow clients and scale your travel business.
2. Display Travel and Tour Packages
After a great introduction, it’s important to show travel packages and destinations on your website. This helps travellers easily plan their trips and find the best options for what they need.
Similarly, show how your services differ from others and what advantages buyers can expect from purchasing from you.
Displaying discounts and other offers on particular tour packages can attract more clients to your travel business.
3. Secured Booking System
Your travel agency website must have a secure booking system.
It builds customer trust, ensuring their financial information is protected and their bookings are confirmed. A secured booking system also reduces fraud speculations for your business and keeps your customers’ sensitive data safe.
Plus, it offers a smooth booking experience for travellers, increasing bookings and overall customer satisfaction. It’s a win-win!
4. Easy Payment Methods
The payment process must be easy for your clients. Therefore, your travel agency website must include a dedicated payment gateway.
Whenever your customers book a service from you, they should be able to pay for the package securely without the risk of cash fraud.
Additionally, offer a variety of convenient and reliable payment methods. This allows customers to choose their best options and ensures all transactions are secure and protected.
5. Travel Tips
Newbie travellers are generally always looking for ways to plan their trips. Adding travel tips to your website, such as what to pack, when to arrive at the airport, and how to keep luggage safe, can be a valuable resource for them.
This not only helps them feel prepared but also positions your website as a trusted guide.
6. Social Proof
Ever wonder why vacation photos are so popular? Seeing happy travellers inspires others to embark on their own adventures! That’s why showcasing images of your customers enjoying their trips is essential.
Similarly, you can encourage customers to submit testimonials and reviews about your travel services. Positive feedback builds trust with potential customers and positions your website as a reliable source.
Step-by-Step Process to Create a Travel Agency Website
Here’s how to build a full-fledged travel agency website with a booking system using WordPress.
Step 1: Select the Platform for Your Website
Building your travel agency website starts with selecting the right platform.
While I will focus on using WordPress for this blog, other platforms like Wix can create similar websites for you. However, WordPress offers several advantages over such platforms, especially for travel websites.
WordPress is known for its user-friendliness and ease of use. Even if you’re not a tech expert, you can navigate the platform with relative ease.
You simply install the required plugins and themes, configure them with your business information, and you’re ready to launch!
Step 2: Pick Your Domain Name
After selecting your website platform, it’s time to pick the perfect domain name for your travel company.
Domain, also known as a URL, is your website’s address on the web. Your website’s domain name is your identity, and it plays a vital role because it makes the first impression.
Here are some key factors to consider when choosing your travel agency website’s domain name:
- The name should be short and catchy.
- It should be unique and stand out from the crowd.
- Consider using keywords related to the travel industry, but avoid generic terms like “adventure” or “wanderlust.”
- Avoid using numbers and hyphens, as they can make the domain name harder to remember and more susceptible to typos.
For domain names, you can look for different domain extensions. The price for domain names differs between different domain extensions. Usually, you can find the following domain extensions:
- .com
- .org
- .net
- .co
- .us
I recommend using online tools like Wordoid to help you choose a good domain name for your travel agency website. It provides you with plenty of great options to help you pick the best name for your website.
Once you’ve chosen a unique domain name that reflects your travel business, it’s time to secure it. You can purchase your domain name from a trustworthy domain registrar. Popular options include registrars like Namecheap and GoDaddy.
However, many hosting companies also sell domain names. You can purchase both your domain and website hosting at the same time for convenience.
Step 3: Choose Web Hosting
Now that you have picked your domain name, it’s time to get your website online by purchasing web hosting.
Web hosting is the foundation on which your website is built. It provides the essential storage, accessibility, performance, security, and uptime needed for your website to function effectively in the online world.
Several popular and reliable hosting companies can help you get started. While I’m using Bluehost as a reference here, you should consider other options based on your specific needs.
Here are the easy steps to buy and set up web hosting using Bluehost:
Go to bluehost.com and click the Pricing menu.
Now, select the plan that fits your preference.

If you are new to this, you can select the Basic plan that costs just $2.95 per month, which is applicable for the 12-month package.
In the next step, you’ll be prompted to enter your domain name.
As mentioned earlier, you can purchase your domain name during this process, or if you already own one, select “Use a Domain You Own” and enter your existing domain name.Then click the Next button to continue.

Next up, add your account information and finalize your package to end the hosting and registration process. Select the 36-month plan as it offers the best value.
Similarly, add a billing address for payment and tick the box to present your agreements to Bluehost’s Terms and Services. Now, click the Submit button.


You have now successfully purchased the web hosting for your travel agency website.
Additional Setup:
After purchasing Bluehost hosting, you’ll receive login information (username and password) to access your Bluehost control panel. This is your online hub for managing your hosting service.
The next step involves updating your domain name’s nameservers, which essentially point your domain to your hosting.
It can take anywhere from 24 to 72 hours for the Internet to fully recognize your new domain name and its connection to your hosting. In rare cases, it can extend up to a week.
Step 4: Install WordPress
Many Bluehost plans include a One-click WordPress installation process.
Here’s a general guideline:
- Login to your Bluehost control panel.
- Find the Advanced section in the left sidebar. Then, select the WordPress option in the Softaculous Apps Installer section.

- Now, click the Install Now button to start the installation process.

- If you have multiple domains, select the domain name where you want to install WordPress.

- Add a username and password for your WordPress admin panel (where you’ll manage your website content)

- Add your desired website title and tagline.
- Once you’ve entered your details, Bluehost will handle the installation process.
Once the installation is complete, you can access your website’s admin dashboard by visiting:
[http://yourdomainname.com/wp-admin]Replace “yourdomainname.com” with your actual domain name.
Then, you can log in to your website’s admin dashboard using the username and password you created during the WordPress installation step.

Additional Setup:
For SEO and user experience, I highly recommended you to set up your permalink structure by post name.
To do this:
- Go to Settings > Permalink
- Select the Post name option.
- Click Save Changes at the bottom of the page.

Step 5. Choose the Best Travel Agency WordPress Theme
Now that you’ve laid the groundwork with WordPress, it’s time to personalize your travel website!
Appearance is the first impression your visitors will have about your website, so your website must be as visually appealing as informative.
While WordPress provides default themes like Twenty Twenty, they typically lack the functionality needed for a travel booking website. I suggest choosing a travel-specific theme to enhance the user experience and showcase your travel offerings.
To narrow down your search, here are some themes for a travel booking website:
i. Travel Monster Pro

Travel Monster Pro is a feature-rich WordPress theme for creating travel and tour booking websites. You can build various travel websites such as city tours, trekking, hiking, cycling, jungle safari, etc.
Fully compatible with the WP Travel Engine plugin, it allows you to easily add tour packages, destinations, and activities. This theme is also SEO and mobile-friendly, enhancing your site’s visibility on search engines like Google.
ii. Travel Booking Pro

The Travel Booking Pro theme pairs with the WP Travel Engine plugin to help you build a full travel booking website. You can easily create custom trips with detailed itineraries and FAQs.
This theme includes the advanced trip search extension, allowing customers to search trips by details like destination and price.
iii. Travel Agency Pro

Travel Agency Pro is another theme that works well with the WP Travel Engine plugin.
This speed-optimized theme lets you add trips, destinations, and trip types. It also makes it easy for your users to book their favourite trips on your website.
For more theme inspiration, you can explore our curated list of travel agency WordPress themes.
Steps to Install a WordPress Theme
Next, let me walk you through the process of installing a theme on your WordPress site. I’ll use the Travel Monster theme as an example, but these steps can be applied to any theme you choose.
- First, navigate to Appearance>>Themes>>AddNew.

- Once you’re on the next screen, type ‘Travel Monster’ in the search bar from the Add Themes page.

- Then, click the Install button. After installation, select the Activate button to set the theme active on your website.

One of the standout features of the Travel Monster theme is its collection of easily importable starter templates.

This can be a huge time-saver, especially for those new to WordPress or with limited design experience.
Importing a demo provides a pre-built website structure with sample content, pages, and layouts, giving you a foundation to build upon and customize to fit your specific travel agency needs.
Here’s a video on how to import the Travel Monster demo:

Step 6. Install Plugins for Added Functionality
While a good travel theme will provide core features like booking forms and destination displays, plugins can offer more specialized functionality. For example, you might want a plugin for:
- Currency conversion
- Payment gateways (to accept online payments)
- Multilingual support
- Advanced SEO features
Here’s how you can install the plugin on your WordPress Dashboard. I’ll use the WP Travel Engine plugin as an example, but you can use these steps for any plugin of your choice.
- First, navigate to Plugins > Add New from the left sidebar.

- In the search bar, located at the top right corner, enter the name of the plugin you want (in this case, ‘WP Travel Engine’).

- Once you find the plugin you want, click the Install Now button. After it finishes installing, click the Activate button.

Some Popular WordPress Plugins for Travel Agency Websites:
There are many must-have plugins for a travel booking website. Here, we will discuss a few of those.
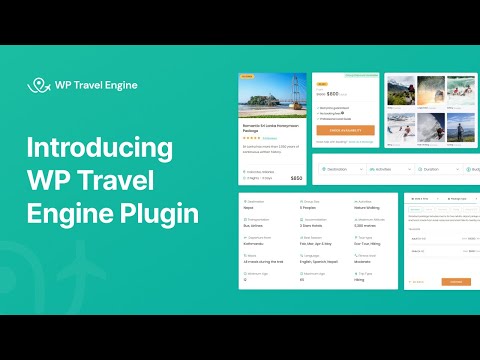
i. WP Travel Engine

WP Travel Engine is the best Wordpress plugin for a travel booking website. It provides all the tools you need to create travel packages and helps you increase bookings, inquiries, and Average Order Value (AOV).
Its smart booking system automatically changes prices based on the number of bookings. Additionally, it works with different payment methods, such as PayPal, Stripe, PayFast, Authorized.net, and more.
This plugin is all you need to build SEO-friendly Travel Websites in minutes. You can refer to the below video tutorial, which walks you through the entire plugin features and how you can use it to build a travel website.
ii. RankMath
RankMath is a free WordPress SEO plugin that lets you optimize your travel website for better visibility on search engines. It includes modern-day SEO features including the 100-point page analysis test. Similarly, this theme allows you to optimize for up to 5x target keywords per page for free.
Moreover, RankMath has a 1x-click advanced SEO analysis tool that assists you to perform a wide audit in a flash. You can also manage meta tags for things like noindex, noarchive, and nofollow.
iii. WP Rocket

WP Rocket is a top WordPress caching plugin that helps your website load faster and perform better. It boosts your site’s speed and also improves your PageSpeed score. This plugin optimizes your Core Web Vitals, which are essential for a smoothly running site.
WordPress experts often recommend WP Rocket as it significantly enhances performance, making your website function more effectively.
Now that you’ve installed the necessary plugins let’s learn how to create pages and posts.
Step 7: Add Content to Your Travel Website
Now that you’ve chosen a stunning theme and installed essential plugins, it’s time to bring your travel website to life with captivating content!
This content will not only inform potential travellers but also showcase your unique travel offerings and expertise.
Essential Content Pages:
- Homepage: On this page, introduce your website by including an overview of your company’s missions, tagline, and services. You can also include CTA (Call-to-Action) on this page.
- About Us: Tell your story! On this page, share your travel agency’s values, expertise, and experiences that set you apart.
- Destinations Page: Showcase the amazing locations you offer! Create dedicated pages for each destination featuring descriptions, photos and videos.
- Trip Page: A Trip Page is one of the most important sections of your travel agency website. Here, showcase sample itineraries, highlight different trip types (adventure, luxury, etc.), and provide transparent pricing for each package.
- Contact Page: Here, you can include your company’s contact information, including your phone number, email address, and a contact form.
Here’s a quick guide on creating pages for your travel website using the WordPress dashboard:
- In your WordPress dashboard, look for the menu on the left-hand side. Select Pages from this menu.
- Click the button Add New Page to create a new page for your website.

- To edit an existing page, navigate to All Pages and find the specific page you want to modify from the list. Click Edit to make changes.

- Once the page loads, you can write your content and personalize your page layout using the provided editor.
- Once you’re happy with your page, click the Publish button to make it live on your website.

Repeat these steps to create additional pages for your travel website.
While creating basic pages in WordPress is straightforward, more complex pages like Trip Pages usually require a bit more technical knowledge, especially if you’re a beginner.
The good news is that plugins like WP Travel Engine can simplify this daunting process. In the next section, I’ll guide you through creating a trip page using this plugin.
If you haven’t already installed the WP Travel Engine plugin, refer back to Step 6 for the installation instructions.
Now that you know the basics, let’s jump right in and get started with creating your trip page!
If you prefer video tutorials, you can also follow this video tutorial to create trip packages using WP Travel Engine:

- In your WordPress dashboard, locate the menu on the left. Look for Trips and select it.
- Within the Trips menu, navigate to the Add New menu. This will open a dedicated page for creating your trip details.

Now, you need to fill in the trip details, such as the trip title, trip type, destination category and so on.

The ‘WP Travel Engine – Trip Settings’ configuration will allow you to add all the essential information for your trip. Here, you can enter extra details like:
- Dates & Price
- Overview
- Itinerary
- Map
- Gallery
- Faqs
- Inclusions & Exclusions
- Extra Services

Once you’ve filled in all the trip details, remember to click the Save & Continue button.
When you’re finished with your trip page, click the Publish button on the top-right corner of your window.
Follow the same steps to create another trip page.
If you need help crafting compelling tour descriptions and itineraries, check out our helpful articles,
- How to Write a Tour Description For Your Website (With Examples)
- How to Write a Travel Itinerary For Your Website (With Example).
These resources offer valuable tips and examples to enhance your content.
Step 8: Add Navigation Menu
After creating pages for your travel website, it’s time to add them to the menu so that visitors can easily find them.
Depending on your theme, such as the Travel Monster, you may have various menu options. These can include customizable top and footer menus.
Here’s how to configure your site menu:
- From your dashboard, go to Appearance > Menus.

- You might see an existing menu. You can edit this one or create a new one by clicking Create a new menu at the top.
- Give your new menu a name (this won’t be shown publicly). Click Create Menu.

- Now, you can add items to your menu. On the left side, you’ll see options like Pages, Posts, Categories, and Custom Links.

- Select the items you want to add and click Add to Menu. You can drag and drop pages to reorder your menu or arrange pages as sub-pages beneath others.

- Scroll down and check the box(es) next to where you want your menu to appear on your site (options will vary depending on your theme). Common locations include “Primary Menu” or “Header Menu”.

- Once everything is set, click Save Menu.
This action sets the menu as your site’s main menu, which will appear in your header.
Step 9: Customize Your Travel Website
Now that you’ve built the foundation of your travel website, it’s time to personalize it and make it truly your own!
As of now, most of your content and pictures of the websites are imported from the demo and are not original. So, go ahead and delete or edit the demo content and images you see on your website.
Customize your website’s color scheme, fonts, and logos to reflect your brand personality.
To access the customization options, navigate to your WordPress dashboard and select “Appearance” followed by “Customize.”

This will open a user-friendly interface where you can edit numerous aspects of your website’s appearance, such as:
- Site Identity
- General
- Colors
- Typography
- Main Header
- Footer Setting
- Menus
- Widgets
- Homepage Settings
Now, to modify your website name, upload your favicon and logo:
- Go to Appearance > Customizer
- Locate the Site Identity menu in the left sidebar.

- Add your website name and tagline, and upload your favicon and logo.
Note: The favicon is the small icon displayed in the browser tab, while the logo is your brand’s visual identity.
By default, WordPress displays your latest blog posts on the homepage. If your website focuses more on travel services than blogging, you might prefer a static homepage to showcase your travel offerings more prominently.
To do this,
- Within the customizer, navigate to the “Homepage Settings” section.
- Select specific pages you want to designate as your homepage and your blog’s post page.

Step 10. Integrate Online Bookings and Payments Gateways
The final step in creating a fully functional travel agency website is integrating a booking system and payment gateways. After all, if potential customers can’t book trips directly from your website, its effectiveness diminishes significantly.
The good news is that you’ve already taken a big step towards booking functionality!
The WP Travel Engine plugin you installed comes with a built-in booking system. This allows potential travellers to easily purchase the trips they like directly from your website.
WP Travel Engine also supports popular payment options like PayPal, bank transfer, and check payment by default.
If you’d like to add additional options like PayU or Authorize.Net, you can achieve this by exploring the plugin’s payment add-ons.
For a more detailed guide on integrating payment gateways with travel websites, refer to our helpful article: How to Integrate Payment Gateway in Travel Website.
While the free version of WP Travel Engine offers a robust set of features, you can unlock even more functionalities with its premium add-ons. Here are some add-ons that can be beneficial for your travel agency website:
i. Authorize.net Payment Gateway
The Authorize.net Payment Gateway lets you accept credit card payments directly on your travel website. To set it up, all you need is your Authorize.net API account login ID and transaction key.

ii. Group Discount
The Group Discount add-on lets you give discounts to groups based on the number of travellers booking a tour. You can create different discount levels for various age groups. Giving group discounts is a great way to boost your bookings and conversion rates.

iii. Trip Fixed Starting Dates
The Trip Fixed Starting Dates add-on allows you to schedule specific dates and times for your trips, ensuring travellers can book only when it suits you. It also lets you set the number of available spots and arrange for recurring trips.

iv. Itinerary Downloader
The Itinerary Downloader is an extension for the WP Travel Engine plugin that lets you create a PDF of your trip itinerary. It also allows you to include various trip details to make an offline brochure file that’s easy to access.

Step 11. Launch Your Website
You’ve built a beautiful and informative travel website that’s ready to showcase the amazing travel experiences you offer to the world. Now it’s time to make it live and share it with potential customers.
However, before officially launching, thoroughly test all aspects of your website. Ensure your booking system functions smoothly, payment gateways process transactions securely, and all pages and links work correctly.
Step 12. Promote Your Website
With your website launched, it’s time to attract potential customers and turn them into happy customers.
You can use various marketing channels, including social media, email newsletters, and SEO optimization to reach a wider audience.
For even more tips on promoting your travel business, check out our comprehensive guide: How to Promote Your Travel Business.
Step 13. Keep Your Website Up-to-Date
Your travel website is a living entity that requires regular care and maintenance.
You can regularly update your website with new blog posts, destination details, special offers, and travel packages to keep visitors engaged and coming back for more.
Further, you must ensure your WordPress core, themes, and plugins are updated to the latest versions to address any security vulnerabilities. For an extra layer of safety, you can also regularly back up your website data.
Wrapping Up
You’re all done! You have successfully built a travel agency website!
Though WordPress makes it easier to create a travel agency website, it could take some time for you to get acquainted with some features and customization options. Make sure your website has important features like a booking system and payment system to get underway.
As you move forward, don’t hesitate to experiment and try new things on your travel website.
Share your thoughts about this guide in the comments section below. All the best creating your travel agency website with WordPress!


Such a informative content! I hope everyone loves to travel for mental freshness. With the help of travel, we can improve health and immunity.