We’ve introduced two major enhancements to make your trips more engaging, better organized, and easier to manage, both for you and your travelers.
1. Trip Departure Calendar – Showcase All Upcoming Trips in One Place
We heard your feedback, your travelers wanted a simpler way to view all upcoming departures without checking each trip individually.
Meet the new Trip Departure Calendar feature, now available under the Trip Fixed Starting Dates add-on. This feature gives your tours a professional, easy-to-navigate schedule view.

What You Can Customize
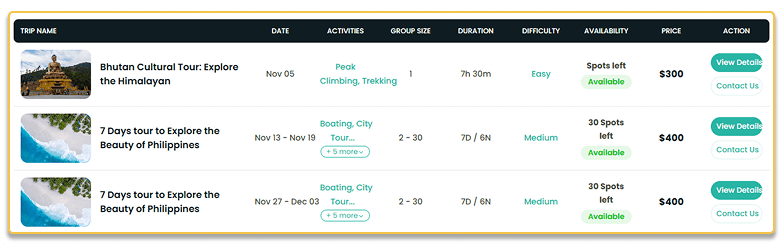
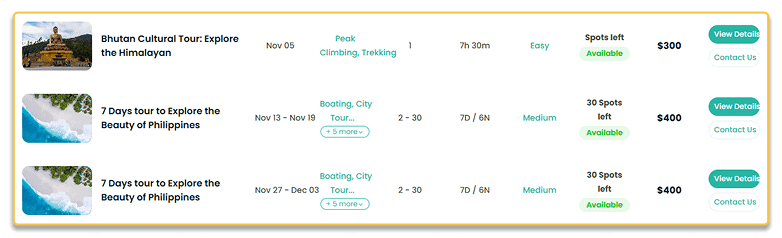
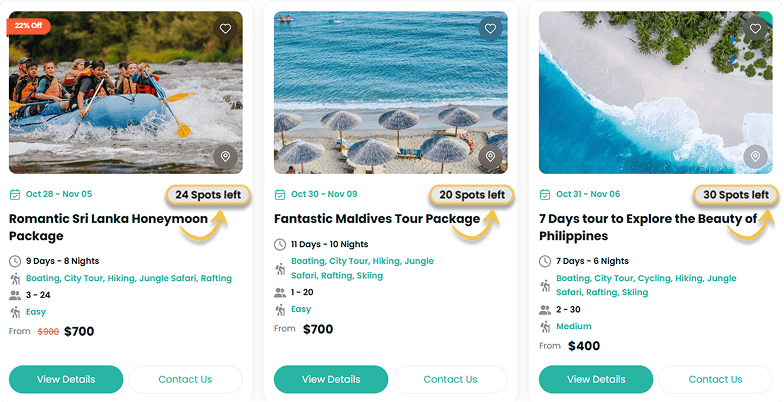
- Default Layout: Choose Grid (compact cards) or List (vertical stack) layouts. Two types of List layouts are available.
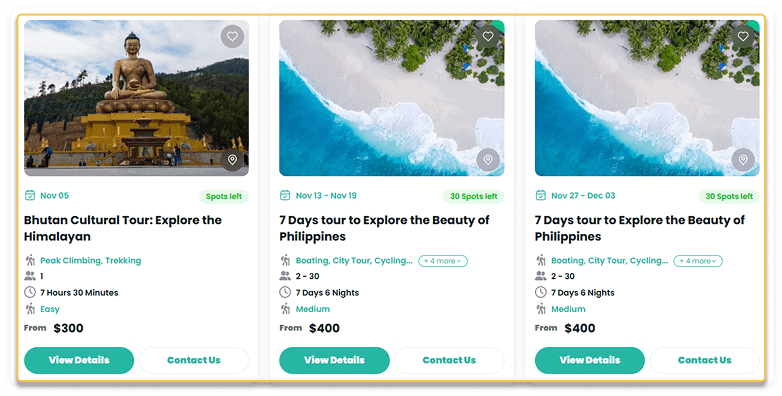
- Number of Trips to Display: Set how many trips appear initially – anywhere from 3 to 48 trips.
- Trip Info to Display: Select which details appear under trip titles, such as Duration, Difficulty, and Activities (up to 4 facts).
- Show Available Seats: Show or hide the seat availability display for each tour.
- Show Only Booked Trips: Show or hide trips with at least one confirmed booking.
- Show Only Available Trips: Show or hide fully booked departures to display only bookable options.
- Show Contact Button: Show or hide the “Contact Us” button on each trip card or row, with the option to customize its label.
How to Configure:
Navigate to WP Travel Engine > Settings > Extensions > Fixed Starting Date. Look for the new Departure Calendar tab.
How to Display the Trip Departure Calendar
You can add the Departure Calendar to any page or post using shortcodes. Simply copy and paste the shortcode where you want the calendar to appear.
Simple shortcode:
[WPTravelEngine_Trip_Departure_Calendar]
This displays the calendar with settings from the global configuration.
Advanced shortcode:
[WPTravelEngine_Trip_Departure_Calendar layout=”list-one” display_contact_us=”true” display_available_seats=”true” display_only_booked_trips=”true” display_available_trips_only no_of_trips=”24″ exclude=”trip_ids” include=”trip_ids”]
Use this advanced shortcode to override default settings on specific pages.
Customizable Attribute Options for the Advanced shortcode:
- layout=”list” (list-one, list-two, grid)
- display_contact_us=”false”
- display_available_seats=”false”
- display_only_booked_trips=”false”
- display_available_trips_only=”false”
- no_of_trips=”24″
- exclude=”trip_ids” (comma separated)
- include=”trip_ids” (comma separated)
2. Additional Itinerary Fields – Add Key Details at a Glance
You highlighted the need for more flexibility in the itinerary builder. While itineraries included all the details, plain text didn’t always make the day-by-day journey easy to follow.
Meet the new Additional Itinerary Fields feature, now under the Advanced Itinerary Builder add-on. It presents key daily details with clear titles and icons, giving your travelers a quick visual overview and saving you time on manual formatting.
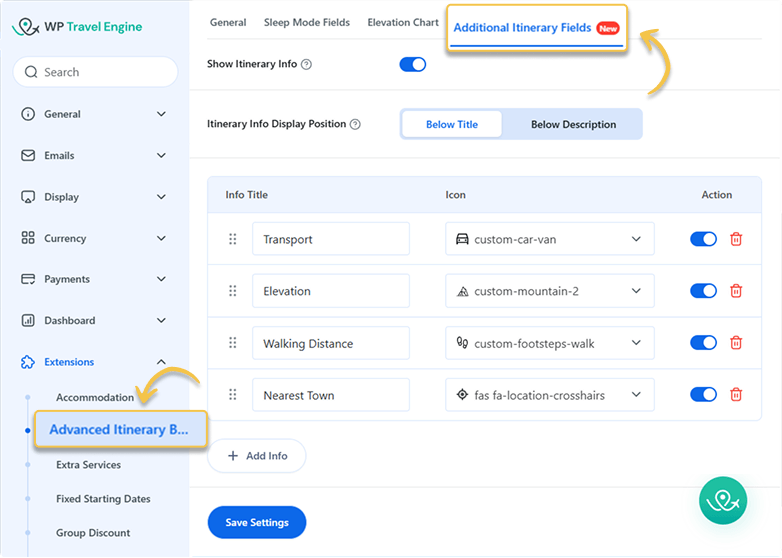
You can find it under WP Travel Engine > Settings > Extensions > Advanced Itinerary Builder, in the new Additional Itinerary Fields tab.
What You Can Customize
- Show Itinerary Info: Show or hide structured day-by-day itinerary details for each trip.
- Itinerary Info Display Position: Choose where the additional info appears on the frontend, either Below Title (default) or Below Description.
- Add New Info Fields: Create and manage custom itinerary info fields.
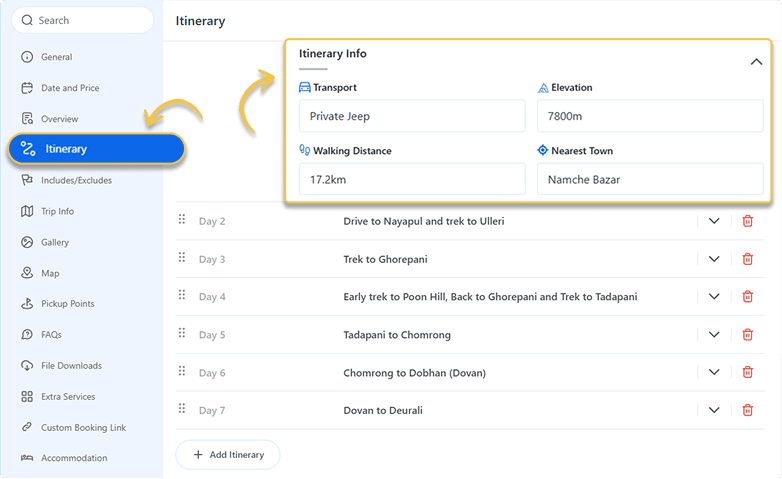
To enter the information for the fields configured above, go to your trip page. Scroll down to find WP Travel Engine – Trip Settings > Itinerary. A new Itinerary Info section is available for each day, where you can enter the relevant data.
Conclusion
With the Trip Departure Calendar, travelers can quickly see all upcoming departures and availability, while the Additional Itinerary Info ensures every day’s details are clear and consistent.
Together, these updates make trip planning easier for your team and more informative for your customers.
Update WP Travel Engine to its latest version to take full control of your schedules and itineraries.